How to Restore Your Roof After a Storm
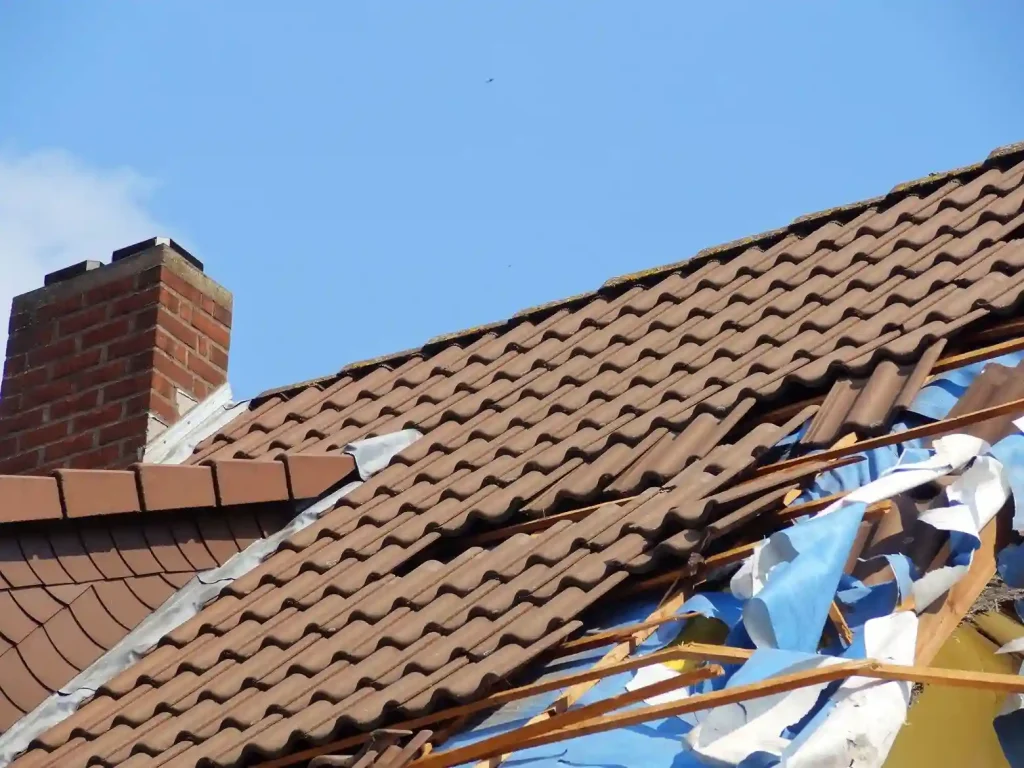
A storm happens fast. Yet, the moments after can turn to anxiety when you spot shingles in the yard or a leak in the ceiling. The damage weakens your home’s first line of defense.
Restoring your roof after a storm is a serious job that prevents structural decay, mold, and astronomical repair bills. Understanding the proper restoration process can help homeowners make informed decisions, work effectively with contractors, and ensure their roof is ready to withstand future weather events.
This comprehensive guide walks you through every stage of post-storm roof restoration. Keep reading!
Recognizing the Immediate Aftermath of a Storm
The aftermath of a storm presents downed power lines, unstable tree limbs, and slippery surfaces. Before you even think about your roof, take stock of your surroundings. If you smell gas or see sparking wires, evacuate and call 911.
Look for visible signs of roof distress, including:
- Displaced shingles in the yard
- Dented gutters
- Broken skylights
- Sections of fascia hanging loose
- Check for water stains, damp insulation
- Daylight peeking through the roof boards
These early clues establish the severity and help you communicate clearly with insurance adjusters and contractors later. Make mental notes about the timing and nature of the storm.
How to Choose a Reliable Roof Contractor
A trustworthy professional will handle everything from final damage documentation to installation and warranty. A storm chaser can leave you with substandard work and a voided manufacturer’s warranty. Search for a qualified storm damage roof contractor who is established in your area.
Verify their state licensing, insurance, and manufacturer certifications that indicate advanced training. Ask for local references and check online reviews. A reliable contractor will never pressure you to sign a contract on the first visit.
They should offer to be present during the adjuster’s inspection to advocate for a fair scope. Get at least three written estimates and compare them line by line.
Be wary of lower bids. They will omit permit fees, underlayment replacement, or proper flashing details. The right partner educates you and provides a transparent contract.
Prioritizing Safety
Climbing onto a storm-damaged roof is one of the most dangerous things a homeowner can do. Even if the damage looks superficial from the ground, hidden structural weaknesses can cause a collapse under your weight.
Safety must be your non-negotiable priority. If you need a closer look, use binoculars from the ground or a drone if you’re experienced. Keep children and pets indoors until you’re certain no sharp debris litters the yard.
Wear sturdy boots if you must walk around the exterior. Never trade a roof inspection for a trip to the emergency room.
Professionals have harnesses, roof brackets, and the training to navigate compromised surfaces safely. Let them take the physical risks while you focus on documentation.
Documenting the Damage for Insurance Purposes
Insurance claims live and die by documentation. Before you move a single shingle or tarp over anything, take date-stamped, high-resolution photos and videos of all damage. Capture wide shots showing the whole roof from multiple angles and close-ups of specific damage.
Photograph the surrounding environment to establish the storm’s breadth. If safe, place a coin next to hail dents on metal surfaces to indicate size. Create a dedicated folder on your computer or cloud storage.
Locate your original roof installation documents and any previous inspection reports. Check whether you have replacement cost value (RCV) or actual cash value (ACV) for a successful restoration.
Common Types of Storm Damage
Not all storm damage looks the same, and understanding the distinctions helps you speak the language of adjusters and contractors. Wind damage can break the adhesive seal, causing them to flap and crease. This leads to tears and complete blow-offs.
Hail damage is more insidious. It causes bruising, a soft spot where the shingle’s reinforcement mat is fractured; these bruised areas will fail prematurely. Hail also knocks off granules, exposing the asphalt coating to UV rays and accelerating aging.
Water damage from heavy rain exploits existing cracked flashing, clogged gutters, or degraded pipe boots. Flying debris impacts can puncture the roof deck outright, demanding immediate emergency repairs. Ice dams and snow load damage follow heavy winter storms and require similar urgency.
Temporary Emergency Repairs to Prevent Further Damage
Most insurance policies mandate that homeowners take reasonable steps to mitigate further damage after a storm. This means covering broken windows, tarping breached roof areas, and stopping active water intrusion. You can do this yourself if conditions are safe and the damage is minor.
For anything beyond securing a small tarp at a low slope, call a professional. A poorly secured tarp can tear off more shingles. Professionals use heavy-duty tarpaulins, furring strips, and cap nails to create a watertight temporary seal.
Document these emergency repairs thoroughly and keep receipts for materials and labor. Insurance generally reimburses reasonable mitigation costs. Inside the house, place buckets under active drips and move furniture and valuables away from wet areas.
If drywall is saturated, poke a small drainage hole to release water and prevent ceiling collapse. Run dehumidifiers and fans to start drying out. Permanent restoration comes after the claim is approved.
Homeowners Insurance Claims Process
Filing a claim efficiently can shorten the time you live with a damaged roof. Contact your insurance company’s claims department as soon as possible after the storm. Provide them with your policy number and the date and time of the storm.
They’ll assign a claim number and an adjuster. Before the adjuster visits, compile your evidence packet. During the adjuster’s inspection, walk the property together and point out all the damage you’ve documented.
Do not sign any final settlement until you are confident the scope covers all necessary work. If the initial estimate seems low, you have the right to request a re-inspection or hire a public adjuster.
Be aware of deadlines. Policies often have strict time limits for filing claims and completing repairs. Keep a log of everything documented and discussed. This paper trail protects you if disputes arise.
What to Expect During a Professional Damage Assessment
When the contractor arrives for their detailed assessment, they will perform a thorough multi-point inspection. They measure the roof’s total square footage, pitch, and complexity to calculate material and labor accurately. In the attic, they check for rafter cracks, wet insulation, and signs of inadequate ventilation that could have worsened storm effects.
Professionals will test shingle adhesion by gently lifting tabs to see if the seal is compromised. Using a chalk or crayon, they circle hail hits and measure them. Insurance companies require a minimum number of hits per square to approve replacement.
The assessment may take an hour or more. You should receive a written report summarizing findings, recommended repairs or replacement, and an itemized estimate.
Don’t hesitate to ask questions about anything you don’t understand. A good contractor welcomes an informed homeowner.
Roof Repair vs. Full Replacement
After assessments are complete, you’ll face the core question: patch or replace? Several factors guide this decision. If the storm damage is isolated, a targeted repair may suffice.
However, if the roof is already near the end of its service life, replacement is the wiser long-term investment. Insurance will pay for full replacement only when damage exceeds the policy’s threshold and a repair can’t restore the roof to a functional state. Building codes may also trigger replacement if the damaged area exceeds a certain percentage of the total roof.
A partial repair on an older roof can create a patchwork appearance and leave the older sections vulnerable to the next storm. Many homeowners find that paying their deductible for a complete reroof now saves them from another claim or deductible. Discuss the lifespan of the chosen materials and what transferable warranties apply to a full replacement versus a repair.
Selecting the Right Materials
The storm gives you a chance to upgrade. Talk to your contractor about impact-resistant shingles. These have a Class 4 rating and resist hail damage. Many insurers offer a discount for impact-resistant roofs.
Think about the long-term value. Architectural shingles last longer and hold up to higher winds. Metal roofing offers great durability and modern style.
Consider the climate in your area. Pick a color that fits your neighborhood and reflects heat if you live in a warm zone. Your insurance payout covers standard materials. You can pay the difference for an upgrade. Choosing quality materials protects your home from the next big storm.
The Roof Restoration Process Step by Step
Once the materials arrive, work begins. The crew will start by protecting your home’s exterior. They set up tarps to catch falling debris.
The old shingles, underlayment, and flashing get stripped down to the deck. The bare wood deck shows no rot or soft spots.
Damaged decking gets replaced to meet building code. A waterproof underlayment goes down. New flashing lines the valleys, chimneys, and vents.
The shingles or metal panels go on, row by row. The crew installs ridge caps, and clean-up begins.
A strong magnet sweeps the yard for stray nails. The whole process for an average home takes one to three days.
Preventing Future Storm Damage with Upgrades
Restoration provides a clean-slate opportunity to build in resilience. Beyond impact-rated shingles, consider upgraded fasteners and enhanced drip edge profiles that channel water away more effectively. Install a continuous ridge vent along with properly balanced soffit vents to keep the attic cooler, which reduces the thermal stress on shingles and minimizes ice damming in winter.
Gutter guards can prevent debris from trapping water against the roof edge. For homes in tornado or hurricane zones, structural hurricane straps connecting rafters to walls can be added during a full tear-off if the deck is exposed.
Trimming overhanging tree branches eliminates a major source of impact damage and leaf accumulation. Invest in a roof snow rake and heating cables if you’re in a heavy snow region. These proactive measures qualify for insurance discounts.
Ask your agent for a wind mitigation or hail-resistant construction credit. Document every upgrade with photos and receipts to prove the fortifications to future insurers or home buyers.
Maintaining Your Restored Roof for Long-Term Protection
A restored roof is an investment that needs stewardship. Schedule a professional roof inspection every two to three years, or annually if you’re in a storm-prone region. After any severe weather event, repeat a ground-level visual check.
Keep gutters clean. Clogged gutters cause water to back up under the shingle edge, rotting the deck and fascia. Trim back overhanging branches regularly.
In the attic, periodically check for signs of moisture, displaced insulation blocking soffit vents, or pest infestations. Check that bath and kitchen exhaust fans vent to the exterior, not into the attic.
If you notice loose granules accumulating in gutters after the first couple of years, it’s normal to a degree, but accelerated granule loss warrants a professional look. Maintain your roof’s warranty by following the manufacturer’s stipulations, which may include periodic documented inspections. Save all restoration documentation in both digital and hard copy formats.
Final Checklist
When the restoration crew declares the job complete, resist the urge to simply wave goodbye. Walk the property with a printed checklist. Confirm that all damaged components listed in the scope of work were addressed: shingles, flashing, vents, gutters, and downspouts.
Check the attic for any new daylight or dust indicating missed gaps. Verify that all permits have been closed out with the local building department. Test the gutters by running a hose so that water flows freely and doesn’t pool behind the drip edge.
Inspect the yard, driveway, and plant beds for any stray nails or debris. Review the final invoice against the contract to confirm no surprise charges.
See if you receive lien waivers from the contractor and all major suppliers to protect yourself from future claims if the contractor fails to pay their material bills. Register your new roof with the manufacturer to activate the warranty. Only when every item is ticked off should you release the final payment.
Your Next Steps Toward Lasting Protection
A methodical, well-informed restoration process after a storm puts you back in control. With these tips, you can turn a crisis into an opportunity.
The roof over your head is a system that shields your family and your biggest financial asset. Treat its restoration with the patience and attention to detail it deserves, and you’ll weather future storms with far greater confidence.
If you are interested in similar topics, visit our website for more.